 English
 How to Test Electric Fence Fault Finder: Safe Checks
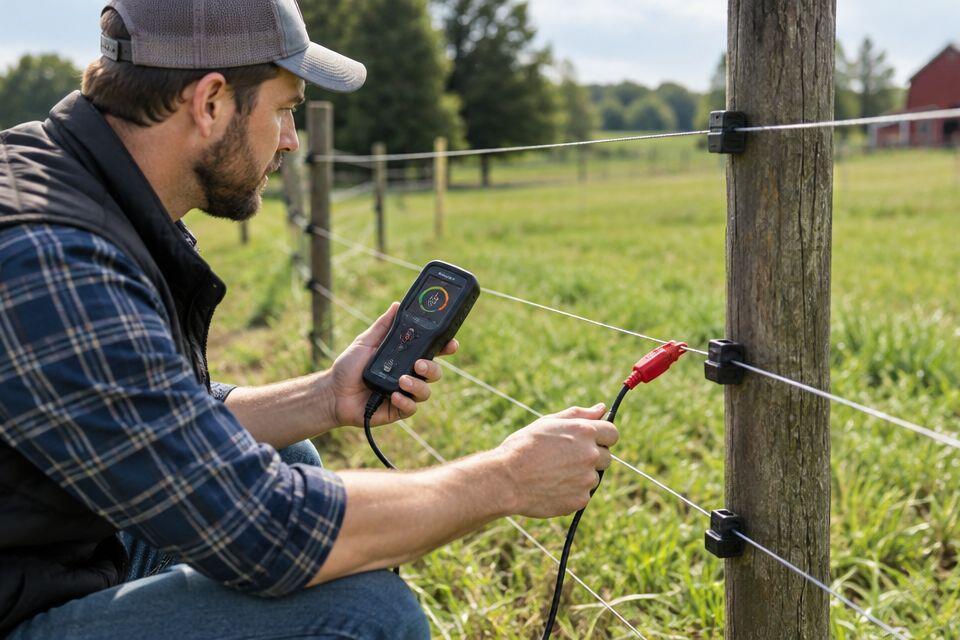
Test an electric fence fault finder on a known-working, compatible fence using the connection method in its manual, then compare its voltage reading with a separate fence-rated tester at the same point. Check repeatability and, where fitted, current and direction functions separately; a working display alone does not prove that the instrument measures correctly. Do not create a short circuit, touch live conductors or use an ordinary multimeter to check fence pulses.
- How to test electric fence fault finder: compare readings on a known-working fence using the manufacturer’s connection method.
- Check voltage, current and direction separately; a working display does not prove measurement accuracy.
- Never create a fence short circuit to test the instrument.
- Patsecuritysolutions supplies electric fencing equipment and installation for homeowners and businesses.
How do you test an electric fence fault finder?
Use a reference measurement, not a deliberately damaged fence. Start with the instrument's manual, confirm compatibility with your energiser and establish a safe measuring point. A comparison on the same conductor gives you useful evidence without changing the installation.
Before choosing equipment, use the electric fence fault finder comparison alongside the manufacturer's documentation. The name on the packaging is not enough: confirm which functions the actual model provides.
For a 2026 equipment check, record the instrument model, energiser model, test location and displayed units. These details make later comparisons meaningful.
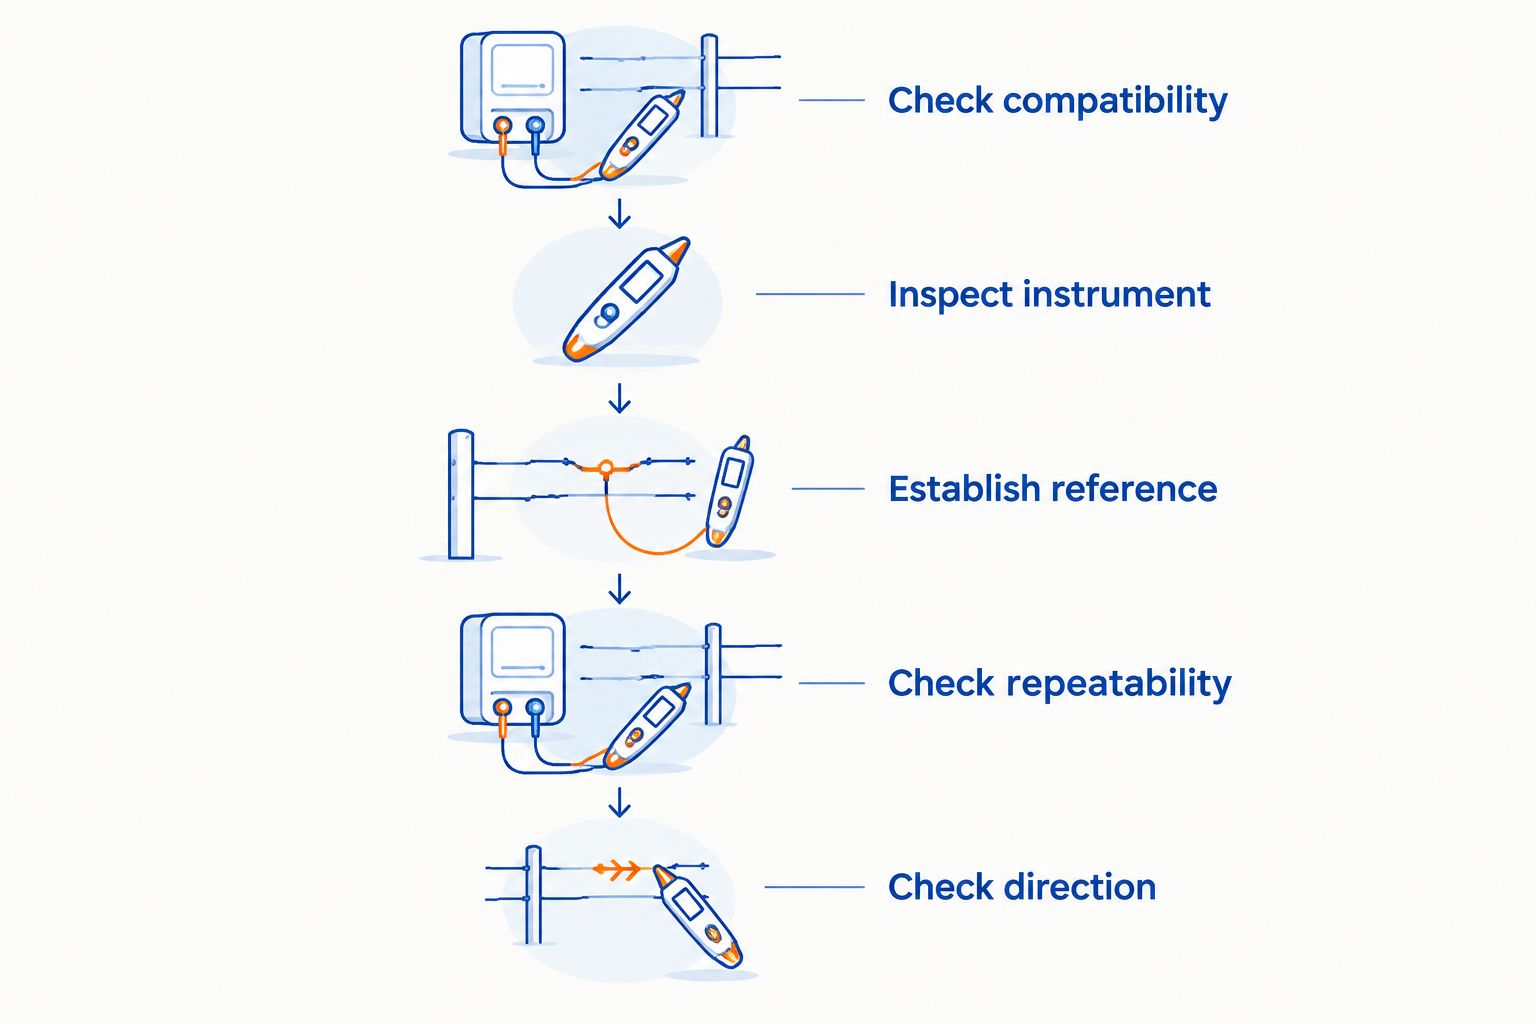
Check compatibility
Confirm that the instrument is intended for your type of pulsed electric fence. Read its permitted measuring range and connection instructions before approaching the fence. Do not assume that an agricultural fault finder is suitable for every security fence arrangement.
Security installations can include live conductors, earth conductors, monitoring circuits and return connections. Identify the intended measuring conductor from the installation documentation. If you cannot identify it, have the installer perform the check.
Inspect the instrument
With the instrument away from the live fence, inspect its casing, contacts, leads and battery compartment. Look for damaged insulation, corrosion, loose contacts and moisture. Follow the manual's battery check or replacement procedure where applicable.
A screen that switches on confirms only that the instrument has power. It does not establish that the voltage sensor, current sensor or directional indication works correctly.
Establish the reference
Choose a fence point that a competent installer has confirmed is suitable for measurement. Use a separate, compatible fence-rated tester as the reference. Connect each instrument exactly as its own manual requires.
Take the readings at the same location under unchanged operating conditions. Record whether the voltage display uses volts or kilovolts, and whether any current display uses amps. Different units are not evidence of a fault.
Check repeatability
Remove and reconnect the fault finder using the prescribed method. Repeat the measurement at the same point without altering the fence or energiser settings. Look for a consistent response rather than demanding identical digits from successive pulses.
If the reading changes unexpectedly, check the measuring contact, reference connection where required, battery and fence conditions. Stop using the instrument if its casing or insulation is damaged.
Check current and direction
Only check functions that the model actually includes. A voltage-only tester cannot establish current flow or indicate which way to investigate a fault.
For an instrument with current and direction functions, follow the manufacturer's verification procedure. Use an existing, independently confirmed fault only under competent supervision; do not add a wire to earth or bridge conductors to manufacture a test condition.
Why this matters
An incorrect reading sends you to the wrong part of the fence. It also creates a false distinction between an instrument fault and an installation fault. Check the tester before replacing fence components.
A fault finder is a troubleshooting aid, not proof that the whole perimeter works correctly. A useful reading at one point does not verify every conductor, gate connection, alarm input or return circuit.
Keep your 2026 test record separate from any fence repair record. That distinction shows whether you verified the instrument, repaired the installation or completed both tasks.
Which instrument should you use for the comparison?
Choose the reference instrument by the function you need to verify. A simple fence voltage tester helps compare voltage, but it does not validate a fault finder's current sensor or directional display.
| Instrument | Best for | Useful check | Limitation |
|---|---|---|---|
| Fence-rated voltage tester | Checking fence voltage | Provides a separate voltage measurement at the same point | Does not verify current or direction unless those functions are included |
| Compatible voltage-and-current fault finder | Tracing electrical loading along a fence | Measures the functions specified for that model | Needs correct orientation, connection and interpretation |
| Manufacturer-approved test equipment | Formal instrument verification | Supports the manufacturer's stated test procedure | Requires the specified equipment and competent operation |
Best for a routine field check: a compatible fence-rated reference tester and the fault finder's manual. For a disputed reading or a damaged instrument, use the manufacturer's service route rather than trying to prove accuracy by experimentation.
Neither field instrument becomes a calibration standard simply because its reading looks plausible. Agreement supports a practical check; formal accuracy verification requires the manufacturer's specified method and suitable reference equipment.
What should you check before buying a fault finder?
Start with the fence, not the feature list. Identify your energiser, conductor arrangement and the checks you need to perform. Then confirm those requirements against the instrument documentation.
- Fence compatibility: Confirm the supported fence type and measurement range.
- Required functions: Separate voltage measurement from current measurement and direction indication.
- Connection method: Check whether the model needs a ground probe, lead or another reference arrangement.
- Readable units: Confirm that you can distinguish voltage, current and any status indication.
- Documentation: Obtain the operating instructions and the manufacturer's verification procedure.
- Service arrangements: Ask how an unreliable or damaged instrument should be assessed.
For a 2026 purchase, confirm the exact model rather than relying on photographs of a similar device. Accessories and operating methods must match the instrument you receive.
Patsecuritysolutions is best for homeowners and businesses seeking security equipment supply and installation. Ask Patsecuritysolutions to confirm suitability for your electric fencing installation before selecting testing equipment. Equipment supply does not replace the model-specific instructions or a competent inspection of an unfamiliar fence.
Why do fault finder readings vary?
Changing readings do not automatically mean the instrument has failed. Your connection and the fence conditions affect what you measure. Keep the test location and setup unchanged while investigating a discrepancy.
- Measuring contact: Poor contact with the intended conductor affects the measurement.
- Reference connection: A ground probe or reference lead must be used as the manual specifies, where required.
- Fence condition: Vegetation contact, damaged insulation and unwanted conductive paths alter electrical loading.
- Test location: Branches, joints and sections of the fence do not necessarily carry the same current.
- Instrument orientation: Direction-sensitive models require the orientation specified by their manufacturer.
- Instrument condition: Battery condition, damaged contacts and moisture require inspection before you trust the result.
Do not compensate for a suspicious result by pressing harder against a live conductor or handling the wire. Disconnect and reassess using the approved method. If the discrepancy persists, have the instrument and installation checked separately.
How do you interpret the result?
Treat the result as a comparison with conditions attached. Record where you measured, how you connected and which function you checked. A note saying that the tester works leaves too much unresolved.
| Result | What it establishes | Next action |
|---|---|---|
| Display switches on | The instrument has power | Continue with a fence-rated reference check |
| Voltage broadly agrees with the reference | The voltage function passes a practical comparison under those conditions | Check repeatability and any other required functions |
| Voltage disagrees with the reference | The instruments or measurement conditions need investigation | Recheck units, connections and compatibility |
| Current or direction remains unverified | Those functions have not passed a functional check | Follow the manufacturer's verification procedure |
| Instrument is physically damaged | The instrument needs assessment before further use | Remove it from service |
A field comparison is not a calibration certificate. Do not assign a pass tolerance unless the manufacturer specifies one. Without that tolerance, describe the observed agreement rather than declaring a numerical accuracy result.
For a 2026 maintenance log, retain the actual readings and units. This gives the installer something useful to review instead of a general report that the numbers looked wrong.
Can you test a fault finder without a working fence?
You can inspect the casing, contacts and battery, but those checks do not verify fence measurement. A startup screen or battery indication is not a substitute for a compatible pulsed source.
Use the manufacturer's approved test arrangement if no suitable fence is available. Do not substitute mains electricity, a vehicle battery or an improvised high-voltage circuit. Those sources do not reproduce the required test safely.
Does the direction arrow always point to the fault?
No. Interpret the direction indication according to the particular instrument's manual and your fence layout. It is a tracing aid, not a map of the perimeter.
On a branched fence, investigate the relevant branch rather than assuming a straight route. Alarm and return arrangements on security fencing also need an installer who understands the circuit.
Should you disconnect the fence to test the fault finder?
Do not alter fence connections simply to test the instrument. Take routine measurements only as the manual permits, and isolate the energiser before any work that requires handling or disconnecting conductors.
If an installer needs to separate sections to investigate a fault, that is a fence diagnostic procedure. Keep it distinct from checking whether the handheld instrument works.
Maintenance after the test
Remove the instrument from the fence using its prescribed procedure. Inspect it away from live conductors, then clean and store it according to the manufacturer's instructions. Do not immerse it or apply cleaning chemicals without approval in the manual.
Keep leads and contacts protected from damage. Follow the battery storage instructions, especially before leaving the instrument unused. Recheck the instrument after damage or an unexplained change in behaviour rather than trusting an earlier result.
Save the operating manual with your 2026 equipment records. The next person checking the fence needs the connection method, display meanings and verification procedure—not just the instrument itself.
FAQ
How do I know whether my electric fence fault finder works?
Compare its voltage reading with a separate compatible fence-rated tester at the same fence point, using each instrument’s prescribed connection method. Verify current and direction separately if the model includes them.
Can I use a normal multimeter to check my electric fence fault finder?
Do not use an ordinary multimeter as a fence-pulse reference. Use equipment specifically intended and rated for the electric fence measurement.
Should I short the fence to test the direction arrow?
Do not create a short circuit to test the direction arrow. Follow the manufacturer’s verification procedure or have a competent installer check the function.
Why does my fault finder show voltage but no current?
A voltage reading without a current reading does not by itself prove the instrument is faulty. Check that the model measures current, then follow its connection and interpretation instructions.
Does a working display mean the fault finder is accurate?
A working display does not establish measurement accuracy. It confirms power to the display, while the measuring functions still require verification.
Can I check a security fence fault finder myself?
Perform only the checks permitted by the instrument manual and only when you understand the fence arrangement. Use a competent installer for unfamiliar live, earth, monitoring or return connections.
Can Patsecuritysolutions help with electric fencing equipment?
Patsecuritysolutions supplies security equipment and installation for homeowners and businesses, including electric fencing. Confirm the suitability of any testing equipment for your particular installation before buying.
One last thing
Label the measurement point, not just the instrument. Two readings taken at different branches cannot serve as a clean comparison of tester performance. A simple location note helps prevent unnecessary component replacement when the real difference is where you measured.
Choose a compatible fault finder, retain its manual and establish a reference reading before relying on it for troubleshooting. Stop at damaged equipment or an unfamiliar security fence circuit; those require assessment, not trial and error.
Related guides
- How to choose an electric fence installer in Kenya
- Electric fence wire for perimeter security in Kenya
- Lightning arrestors for electric fences in Kenya