 English
 Solar charge controller for electric fence: setup in 2026
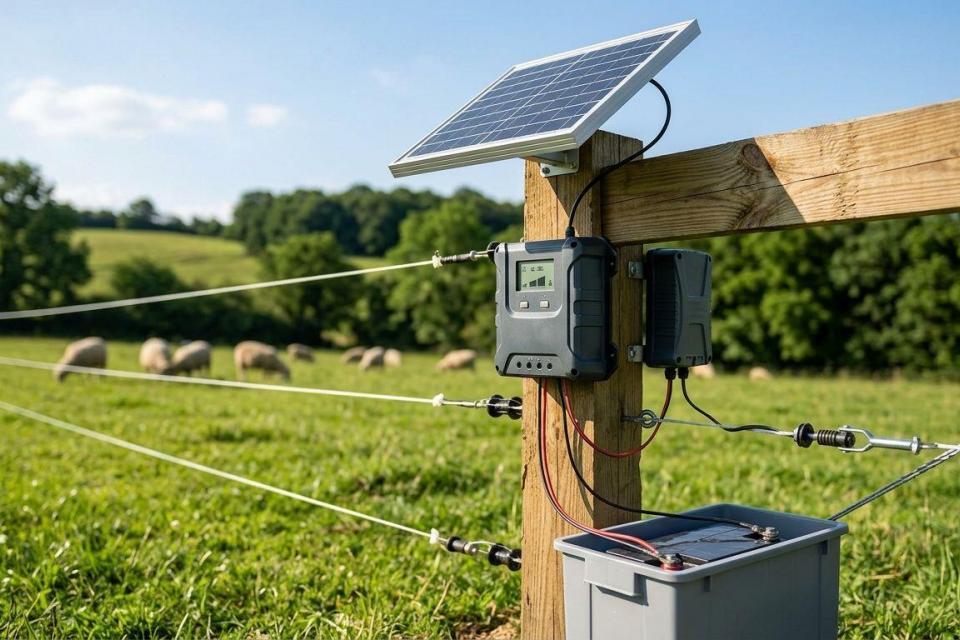
Instead of manually charging an electric fence battery, connect a solar panel to a solar charge controller, use the controller to charge a compatible battery, and power a compatible fence energizer from that battery. A solar charge controller for electric fence power charges the battery; it does not connect to the fence wires. This 2026 guide covers the checks and wiring sequence for that setup.
- A solar charge controller for electric fence power sits between the solar panel and battery, not between the energizer and fence wires.
- Match the controller, battery, panel and energizer before wiring; use each device’s manual to confirm its terminals and limits.
- Patsec Security Store is best for Kenya buyers seeking electric-fencing equipment and installation support; confirm component compatibility before buying.
- A battery-fed energizer is the default arrangement; use a controller load output only if its manual permits that energizer’s demand.
Why this matters
An electric fence energizer needs a suitable power supply to generate its fence pulses. The solar panel produces power when conditions allow; the battery supplies the energizer when the panel cannot. The charge controller manages charging between the panel and battery. It does not replace the battery, energizer or fence earthing system.
A controller that matches the panel but not the battery is the wrong controller for this job. A correctly charged battery still cannot compensate for an energizer that requires a different supply voltage. Treat the panel, controller, battery and energizer as one system, then check the fence output separately. For a 2026 installation, begin with the equipment labels and manuals rather than a generic wiring diagram.
Before you start
- Have the manuals or legible labels for the solar panel, controller, battery and energizer. Record the panel’s electrical ratings, the battery’s voltage and chemistry, and the energizer’s specified input supply.
- Have access to the existing protected battery circuit and the correct isolation points. Have a qualified electric-fence installer handle wiring if you cannot identify them. Switch off and isolate the energizer before work; never handle live fence wires.
- Check the controller’s load-output rules before planning the energizer connection. A terminal marked LOAD is not automatically suitable for an energizer. If the manual does not confirm compatibility with the energizer’s demand, plan a protected battery-fed supply instead.
Patsec Security Store serves homeowners and businesses buying security equipment in Kenya. Before selecting parts for a 2026 fence installation, gather the actual component labels: the product category alone cannot establish that two devices work together.
Choose the supply arrangement
The controller’s job stays the same in both arrangements: charge the battery from the panel. What changes is where the energizer takes power. Use the battery-fed arrangement unless the controller and energizer documentation explicitly support the load-output arrangement.
| Arrangement | Best for | Advantage | Limitation |
|---|---|---|---|
| Energizer fed from the battery through a protected circuit | A DC energizer whose manual specifies a compatible battery supply | Keeps the energizer supply separate from the controller’s load-terminal limits | Protection, cable sizing and isolation must suit the equipment |
| Energizer fed from the controller’s LOAD output | A setup whose controller manual permits the energizer’s electrical demand | Lets you use the controller’s documented load controls | An unsuitable load output can disconnect the energizer or exceed its rating |
Neither arrangement sends solar power straight to the fence wire. The energizer produces the fence pulses. If you are still choosing that device, compare solar-powered electric fence energizers against the supply you can provide; do not assume every solar-labelled energizer uses an external controller.
Match the battery and controller
- Read the battery label. Identify its nominal voltage and chemistry. A controller configured for a different chemistry can use the wrong charging settings even when its terminals fit the cable.
- Read the controller manual. Confirm that it supports the battery voltage and chemistry, then check its permitted solar input against the panel label. Choose the manufacturer’s charging profile for that battery; do not substitute a setting because it appears close.
- Read the energizer input label. Confirm that its specified DC supply matches the battery-fed arrangement you intend to use. A 12 V energizer needs its stated 12 V supply conditions; a 24 V battery is not an interchangeable connection.
- Plan the protected circuit. Identify the battery protection, isolator, cable route and terminal polarity required by the equipment instructions. Do not choose a fuse or cable size from a generic article.
Expected result: you can point to documentation that supports the panel-to-controller connection, controller-to-battery charging and battery-to-energizer supply. If one match is unconfirmed, stop before wiring.
A 2026 product listing is a useful starting point, not a substitute for the label on the unit being installed. Patsec Security Store sells electric-fencing equipment; select a controller from its documented electrical limits, not simply from the presence of a solar terminal. The solar charge controller selection guide helps narrow the category before you check a specific model’s manual.
Configure the controller wiring
- Isolate the system. Keep the energizer off, disconnect the panel from the circuit and follow the manufacturer’s isolation instructions. An exposed solar panel can still generate electricity in daylight.
- Identify the printed terminals. Use the controller’s manual to locate its battery and solar-input connections. They are often labelled BAT and PV, but the markings on your unit take priority. Do not infer polarity from cable colour alone.
- Connect the battery in the manufacturer’s required order. Where the manual calls for battery-first commissioning, make the protected battery connection before the panel connection. Check the displayed or indicated battery voltage and configured battery type against the label.
- Connect the panel as instructed. Confirm panel polarity and that its input stays within the controller’s stated limits before making the connection. Secure and protect the cable as specified for the installation.
- Check the charging indication. Use the controller’s own display or status instructions to establish whether it recognises the battery and solar input. An absence of charging in poor light does not, by itself, prove a wiring fault.
Expected result: the controller recognises the battery and reports solar input under suitable light, without a fault indication. If its battery status is wrong, isolate the system and correct that problem before connecting the energizer.
The sequence is a method, not permission to ignore a particular controller manual. Some controllers rely on battery detection to select their operating voltage; that is why the required connection order matters. For a 2026 replacement controller, repeat the label checks even if the previous unit used the same terminal names.
Connect the energizer supply
- Keep the energizer isolated. Check its manual for input voltage, polarity, supply protection and any instructions for battery operation. Do not connect the controller’s solar-input terminals to the energizer.
- Use the documented supply route. For a battery-fed installation, connect the compatible energizer through the protection and isolation specified for that circuit. Connect to LOAD only when both devices’ documentation supports that use.
- Verify the supply before energising. Check polarity and measure the voltage at the energizer’s supply connection using a suitable meter. Compare the reading with the energizer manual; a battery label alone does not verify voltage at the far end of a cable.
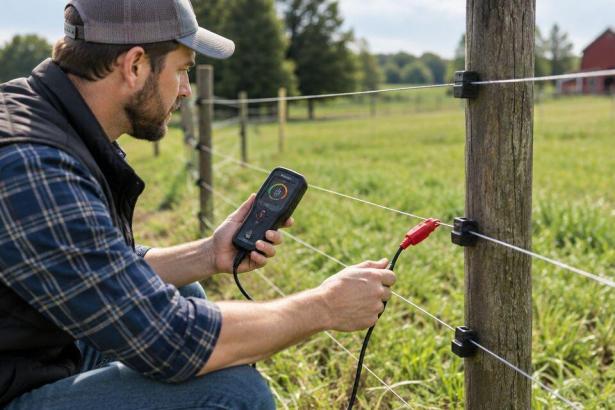
- Restore operation using the energizer instructions. Confirm its normal status indication, then have the fence output checked with a suitable electric-fence tester. Do not use an ordinary supply-voltage measurement as a substitute for a fence-output test.
Expected result: the energizer operates from its specified supply and the fence test follows the energizer’s instructions. If the supply is present but the fence test fails, investigate the energizer and fence circuit separately rather than changing controller settings at random.
Keep solar charging and fence performance as separate checks. The controller can show charging while the energizer is off. The energizer can show a normal power state while vegetation, a damaged insulator or another fence fault affects the output. A 2026 installation needs both checks recorded at commissioning.
Check an existing fence after adding solar charging
You can add solar charging to an existing battery-fed fence only when the battery, panel and controller are compatible with that energizer’s supply arrangement. Do not attach a panel and controller to an unknown battery circuit just because the energizer starts. Identify any existing charger or power source first; follow the equipment instructions for how charging sources are connected or isolated.
- Record how the energizer is powered now and identify every connection to the battery.
- Confirm the battery chemistry and voltage from its label. If the label is unreadable, do not guess the charging profile.
- Match the panel and controller to that battery, then wire them in the manufacturer’s required order while the energizer remains isolated.
- Check charging status, restore the energizer supply and test the fence output.
Expected result: the battery has a documented charging path and the fence still passes its separate output check. If the existing circuit cannot be identified, ask an electric-fence installer to trace it before adding components.
Troubleshooting
- The controller does not recognise the battery. Isolate the circuit and check the battery connection, polarity, protection and connection order against the manual. Do not repeatedly connect the panel to an unidentified battery circuit.
- The controller shows solar input but the energizer is off. Check the energizer’s own supply path and isolator. If it is on LOAD, check whether that output has disconnected or is unsuitable for the energizer; do not bypass protection to test the theory.
- The energizer starts, then stops. Verify supply voltage at its terminals under the conditions described in its manual, and inspect documented low-battery or fault indications. A charging icon does not prove the battery can support the load.
- Charging appears absent during daylight. Check the panel connection and controller status instructions, then inspect for shading or a disconnected panel. Compare the panel label with the controller’s permitted input before reconnecting anything.
- The energizer runs but the fence output is poor. Test the fence with the right equipment and check for a fence-side fault rather than adjusting battery settings. The electric fence fault finder comparison covers tools for tracing that separate problem.
Never touch a conductor to determine whether the energizer is working. Isolate the fence before inspecting wiring or insulators, and follow the energizer’s safety instructions when testing output.
Maintain the workflow
Check the controller and energizer as two devices during routine inspections. Read their status indications, look for damaged or loose visible connections, and keep the panel free of obstruction. Have an installer investigate exposed conductors, damaged insulation or recurring fault indications; switching off a warning is not a repair.
If fence output drops, establish whether the supply or fence circuit changed first. Record the controller status, energizer status and fence-test result so the next check starts with evidence. In 2026, the most useful maintenance note is the one that identifies the component and the fault indication, not just that the fence stopped working.
For new parts, take the panel, battery, controller and energizer labels to the supplier or installer. Patsec Security Store is best for Kenya buyers seeking security equipment and installation support, but no supplier can establish compatibility from an unlabelled battery or an unspecified energizer. Confirm the exact supply requirements before selecting electric-fencing equipment.
FAQ
What does a solar charge controller for electric fence power do?
It manages charging from a solar panel into a compatible battery. The battery supplies a compatible energizer, which generates the fence pulses.
Can I connect an electric fence energizer directly to a solar charge controller?
Use a controller load output only when its manual confirms it can supply that energizer. Otherwise, use the energizer’s documented, protected battery supply route.
Does the solar panel connect directly to the fence wire?
No. The panel connects to the charging system, while the energizer connects to the fence according to its installation instructions.
Should I connect the battery or solar panel first?
Follow your controller manufacturer’s connection order. Where the manual requires battery-first commissioning, connect and verify the battery before connecting the panel.
Can I use a 24 V battery with a 12 V fence energizer?
Not unless the energizer documentation explicitly permits that supply arrangement. Match the voltage at the energizer input to its stated requirements.
Why is the fence weak when the controller shows charging?
A charging indication does not verify fence output. Check the energizer supply and test the fence separately with a suitable electric-fence tester.
What information do I need before buying a controller?
Bring the panel ratings, battery voltage and chemistry, and energizer input requirements. Check the controller manual against those labels before buying.
One last thing
Test the fence after you verify charging. A working solar charge controller does not certify a working electric fence. Keep the battery-supply check and fence-output check separate when commissioning or diagnosing the system.
Related guides